Before We Begin
First off, this tutorial doesn't assume any existing Svelte knowledge. We will use techniques in this tutorial that are fundamental to building any Svelte app (even if it isn't a game-based app).
What Are We Building?
A Tic-Tac-Toe game... plain and simple.
You can see what we’ll be building here:
REPL]
If you come from React, this syntax and code might look foreign to you. If you come from Vue, it may look familiar. Either way, by the time you wrap up this tutorial you should be familiar with the Svelte syntax and code style.
Check out the full tic-tac-toe game before continuing with the tutorial. There is a numbered list to the right of the game’s board that gives a history of all of the moves that have occurred in the game. It's even updated as the game progresses. Pretty nifty, eh?
Now, let's set up some code!
Assumptions
There are a few assumptions made before we move on:
- This tutorial assumes a MacOS environment
- This tutorial uses
yarninstead ofnpm - Some familiarity with HTML and JavaScript
- Common javascript programming concepts like functions, objects, arrays, etc
- Simple CSS styling (we won't go too into detail with styles)
Overview Of Svelte
Before we dive into setting up our project let's look at the default template and what makes up a Svelte component.
What Is Svelte?
Svelte is a javascript framework which takes a new approach to building web apps. Whereas traditional frameworks like React and Vue do the bulk of their work in the browser, Svelte shifts that work into a compile step that happens when you build your app. Svelte is pure JavaScript.
Svelte components are defined in .svelte files and consist of three parts: HTML (markup), CSS (styles) and JavaScript (scripts). All three are optional.
The <script> tag in a .svelte component is where all the logic lives. It contains the JavaScript that runs when a component instance is created. Variables declared (or imported) at the top level are 'visible' from the component's markup.
The <style> of a component controls that component's look. These style rules are scoped to the component so you won't accidentally change the style of elements elsewhere in your app! If you do want to apply styles to a selector globally, you can use a :global(...) modifier.
Finally the html markup in the component is where the markup (and Svelte syntax elements) for the component lives.
Check out the Svelte docs for more in depth information about components.
Basic Structure of a Svelte Component
All .svelte files will basically have the following structure:
<script>
    /* Javascript logic */
</script>

<!-- HTML markup -->

<style>
    /* CSS styles */
</style>
The HTML markup will have some additional Svelte-specific syntax, but the rest is just plain HTML, CSS and JavaScript. How you arrange these three sections is entirely up to you.
Additional Resources
Setup
There are two ways to tackle this:
- Write the code in the browser
- Set up a local development environment on your computer
Setup Option 1: Write Code in the Browser
Fork the REPL starter code and follow along. This is the quickest way to get started!
https://svelte.dev/repl/60c79f7872c041e398de21c428a8ea12?version=3
You can now skip the second setup option, and go to Checking Out The Starter Files section.
Setup Option 2: Local Development Environment
Let's crack open that terminal.
Create a new Svelte project
npx degit sveltejs/template svelte-tictactoeThe degit command is a project scaffolding command from Svelte creator Rich Harris. It clones git repositories without all the git history so you can start with a clean slate (which makes it quicker than git clone). The above command scaffolds a Svelte template into the svelte-tictactoe directory.
Now change into that new directory and install the dependencies:
cd svelte-tictactoe && yarnRun yarn dev to spin up the development server and visit http://localhost:5000. Voila! The Hello World of Svelte apps.
Checking Out Svelte's Hello World
The majority of coding will be done inside the src folder. The main.js file is the entry point.
src/main.js
import App from './App.svelte'

const app = new App({
  target: document.body,
  props: {
    name: 'world',
  },
})

export default app
The above file imports App.svelte and instantiates it with an object containing a target and props. The target is where the component goes inside the DOM. In this case it's the DOM’s document.body. The props are passed into the App component. In this case the prop name is passed in with a value of **"world"**.
Now look at App.svelte.
src/App.svelte
<script>
    export let name
</script>

<style>
    h1 {
        color: purple
    }
</style>

<h1>Hello {name}!</h1>
Up first is the script tag. There is a named export called name. Named exports are how Svelte defines component props.
After the script section is a style tag. This is where any component styles live (remember they are scoped to the component so there is no danger of styles leaking or overwriting each other).
Finally is the component markup. This is a simple h1 tag. The name in curly braces will be replaced by the actual value of the prop.
Update global styles
Open the global.css file inside the public folder and replace its contents with the following:
public/global.css
html {
  box-sizing: border-box;
}

*,
*:before,
*:after {
  box-sizing: inherit;
}

html,
body {
  position: relative;
}

body {
  font: 14px 'Century Gothic', Futura, sans-serif;
  color: #333;
  margin: 20px;
  padding: 8px;
}

button {
  margin: 0;
  padding: 0;
  font-size: 100%;
  line-height: 1.15;
  border: none;
}

ol,
ul {
  padding-left: 30px;
}
Create starter components
Create a folder called components inside the src folder. Here's where we will create our tic-tac-toe components. Create three files: Game.svelte, Board.svelte, and Square.svelte and add the following code into each respective file:
src/components/Square.svelte
<button></button>

<style>
  button {
    display: flex;
    justify-content: center;
    align-items: center;
    background-color: #fff;
    font-size: 24px;
  }
  button:focus {
    outline: none;
  }
</style>
src/components/Board.svelte
<script>
  import Square from "./Square.svelte"
</script>

<div class="board">
  <Square />
  <Square />
  <Square />
  <Square />
  <Square />
  <Square />
  <Square />
  <Square />
  <Square />
</div>

<style>
  .board {
    display: grid;
    grid-template: repeat(3, 1fr) / repeat(3, 1fr);
    grid-gap: 1px;
    width: 200px;
    height: 200px;
    margin: 0 auto;
    background-color: #333;
    color: #fff;
    border: 1px solid #333;
  }
</style>
src/components/Game.svelte
<script>
  import Board from "./Board.svelte"
</script>

<div class="game">
  <Board />
</div>

<style>
  .game {
    display: flex;
    flex-direction: row;
  }
</style>
Update Default Files
src/App.svelte
<script>
  import Game from "./components/Game.svelte"
</script>

<Game />
src/main.js
import App from './App.svelte'
const app = new App({
target: document.body,
})
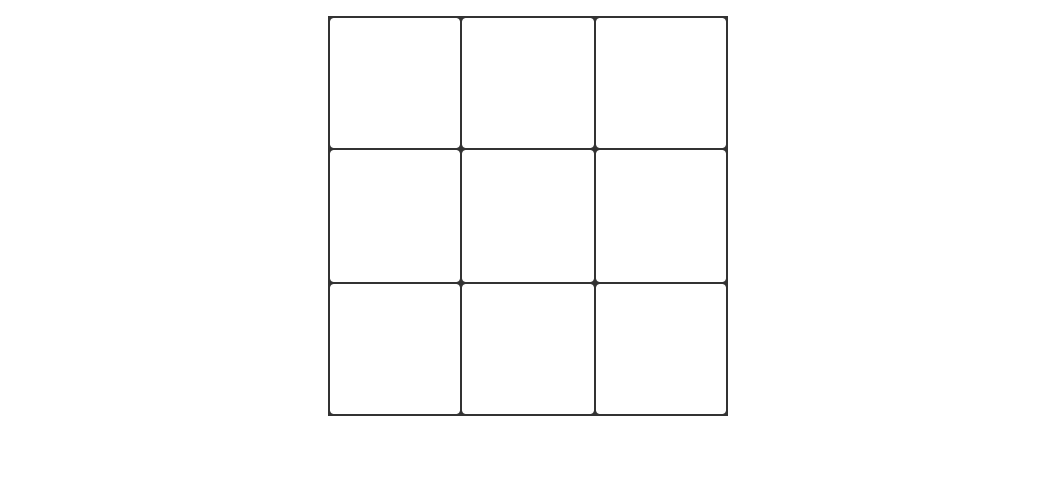
export default appNow if the server isn't still running, run yarn dev in the project folder and open http://localhost:5000 in the browser, you should see an empty tic-tac-toe board.
Checking Out The Starter Files
Square.svelte- renders each square of the Tic Tac Toe board as a buttonBoard.svelte- renders all the Square componentsGame.svelte- renders the Board and is the overall container for the Tic Tac Toe game (and eventually its state)App.svelte- the default Hello World content was replaced with the Game componentmain.js- loads the App into the DOM
There are currently no interactive components.
Initial Game Set Up
Now that our skeleton is set up, let’s get to creating an interactive Board!
Passing Data With Props
To get started, we are gonna learn how to pass some data from our Board component to our Square component. Passing data around through props will come in handy as more functionality gets added. For now, though, we will just give Square a value prop that Board will pass in.
Svelte uses the export keyword to mark a variable declaration as a property or "prop". This prop is now accessible to consumers of the Square component.
Add the following script tag to the top of the Square component:
src/components/Square.svelte
<script>
  export let value
</script>
Update the markup in Square to use the prop as the display value of the button. It will display whatever value is or an empty string if the value prop is falsey. This value will eventually be the "X" or "O" of our game.
src/components/Square.svelte
<button>{value || " "}</button>Now in the Board component pass each Square its value. Replace the Board markup with the following:
src/components/Board.svelte
<div class="board">
  <Square value={'1'} />
  <Square value={'2'} />
  <Square value={'3'} />
  <Square value={'4'} />
  <Square value={'5'} />
  <Square value={'6'} />
  <Square value={'7'} />
  <Square value={'8'} />
  <Square value={'9'} />
</div>
And with that, we are passing a "prop" from a parent component (Board) to a child component (Square).

Automating With Logic
Let's refactor our Board component so that instead of creating each Square individually it loops over a list (specifically an array of null elements) using Svelte's #each block.
Create an array with 9 null elements and store it in a variable called squares. Replace the script tag in Board with the following:
src/components/Board.svelte
<script>
  import Square from './Square.svelte'
  let squares = Array(9).fill(null)
</script>
Now update the markup to the following:
src/components/Board.svelte
<div class="board">
  {#each squares as square}
    <Square value={square} />
  {/each}
</div>
For each element (square) in the array (squares) Svelte renders a Square component and assigns square to the value prop. Because our Square component renders falsey values as an empty string and each square element is null you should see 9 empty squares rendered.
Adding Interaction With DOM Events
Whenever we click a Square we want something to happen. Svelte uses the on: directive to listen to DOM events. To register click events on the button we will use the on:click directive. We will update the current square's value to "X" when it is clicked resulting in an "X" being displayed.
First create a handleClick method that will assign "X" to the value. In Svelte, variable assignments are reactive. When the component state changes by reassigning the locally declared value variable it will trigger a re-render.
Update the Square's script tag to the following:
src/components/Square.svelte
<script>
  export let value
  function handleClick() {
    value = 'X'
  }
</script>
Then update the markup to include the on:click directive assigning it the handleClick function we just defined:
src/components/Square.svelte
<button on:click={handleClick}>{value || ' '}</button>Now when the Square is clicked an "X" is displayed.
Completing The Foundation
The basic building blocks for the tic-tac-toe game are laid out but to have a complete game, we need to alternate placing "X"'s and "O"'s on the board. We also need a way to determine a winner.
Lifting State
Currently the Square is responsible for setting it's own state when it is clicked. Eventually we want the Game component to be responsible for handling the state of our application. To start though we will lift the state into the Board component. We will refactor this again later as we add more features.
In order for the Board to control state, it needs to know when a Square is clicked. In order for a parent component to listen to the event of a child we need to forward the event.
If the on: directive is used without a value the component will forward the event to it's consumer (in our case Board) so it can listen for it.
Inside the Square component, remove the handleClick function and forward the click event. Replace the script tag and markup contents with the following (the styles remain untouched):
src/components/Square.svelte
<script>
export let value
</script>

<style>
...
</style>

<button on:click>{value || " "}</button>
Now let's move the click functionality to the Board component.
The second argument of the #each block is the current index of the loop. We'll use that index to know which square in our array to update.
When a Square is clicked the Board component updates the element of the squares array at the given index. Remember that assignments are reactive so when we update our squares array the component is re-rendered and the Square is updated.
src/components/Board.svelte
<script>
import Square from './Square.svelte'

let squares = Array(9).fill(null)

function handleClick(i) {
  squares[i] = 'X'
}
</script>

<styles>
...
</styles>

<div class="board">
{#each squares as square,i}
  <Square on:click={() => handleClick(i)} value={square} />
{/each}
</div>
Taking Turns
So far the only player that takes a turn is "X" since that value is hard-coded into the functionality of clicking a Square. We’ll add another variable, currentPlayer, to store whethere "X" or "O" should be displayed.
We will also update handleClick to assign the value of currentPlayer to the squares array (rather than the hard-coded "X") and then use some logic to alternate the value of currentPlayer between "X" and "O".
src/components/Board.svelte
<script>
import Square from './Square.svelte'

let squares = Array(9).fill(null)
let currentPlayer = "X"

function handleClick(i) {
  squares[i] = currentPlayer
  currentPlayer = currentPlayer === 'X' ? 'O' : 'X'
}
</script>
With this change, "X" and "O" can now take turns.
Display the current player status
Let's use the currentPlayer variable to display who the current player is. This is a simple update to the markup that takes advantage of using {currentPlayer} along with an added .status class in the styles.
Below is the full Board component (note the updates to the styles and markup):
src/components/Board.svelte
<script>
  import Square from "./Square.svelte"

  let squares = Array(9).fill(null)
  let currentPlayer = "X"

  function handleClick(i) {
    squares[i] = currentPlayer
    currentPlayer = currentPlayer === "X" ? "O" : "X"
  }
</script>

<style>
  .board {
    display: grid;
    grid-template: repeat(3, 1fr) / repeat(3, 1fr);
    grid-gap: 1px;
    width: 200px;
    height: 200px;
    margin: 0 auto;
    background-color: #333;
    color: #fff;
    border: 1px solid #333;
  }
  .status {
    margin-bottom: 20px;
  }
</style>

<div>
  <div class="status">Current player: {currentPlayer}</div>
  <div class="board">
    {#each squares as square, i}
      <Square on:click={() => handleClick(i)} value={square} />
    {/each}
  </div>
</div>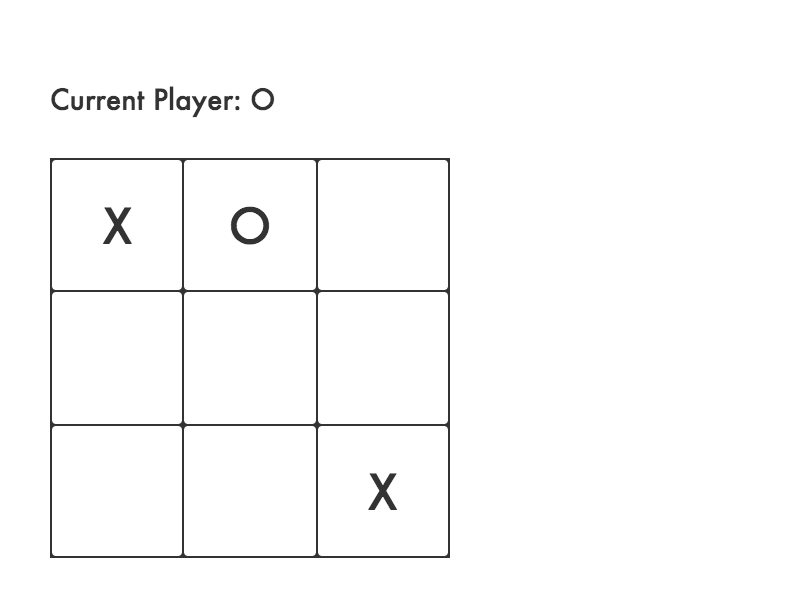
Declaring A Winner
To wrap up the base implementation of the tic-tac-toe game we'll display when the game is won and what player ("X" or "O") won the game or if it was a "DRAW".
We will use a function that checks for a winner when given an array of 9 squares. It will return 'X', 'O', or null. Add this new calculateWinner function before the closing script tag in the Board component:
src/components/Board.svelte
function calculateWinner(squares) {
  const lines = [
    [0, 1, 2],
    [3, 4, 5],
    [6, 7, 8],
    [0, 3, 6],
    [1, 4, 7],
    [2, 5, 8],
    [0, 4, 8],
    [2, 4, 6],
  ]

  for (let line of lines) {
    const [a, b, c] = line

    if (squares[a] && squares[a] === squares[b] && squares[a] === squares[c]) {
      return squares[a]
    }
  }
  return null
}
Now, up top where we declare our other state variables, initialize a piece of state called winningPlayer to null and then update that state as part of our handleClick method.
We will store whether all the squares have been filled in a variable and then use that to determine what to assign the winningPlayer. It will be a "DRAW" if all the squares are filled with no winner, otherwise it will default to the value of calculateWinner.
Currently there is no safeguard against clicking an opponent's Square that has already been clicked. We'll also add a check that only runs the updates if there is both no winner and the Square clicked doesn't already have a value.
Below is the updated script section:
src/components/Board.svelte
<script>
import Square from "./Square.svelte"

let squares = Array(9).fill(null)
let currentPlayer = "X"
let winningPlayer = null


function handleClick(i) {
  if (!winningPlayer && !squares[i]) {
    squares[i] = currentPlayer
    const allSquaresFilled = !squares.filter(square => !square).length
    currentPlayer = currentPlayer === "X" ? "O" : "X"
    winningPlayer = calculateWinner(squares) || (allSquaresFilled && "DRAW")
  }
}

function calculateWinner() {
  ...
}
</script>
Now let's update the status section of the markup with an #if statement that will either show the current player or the winner.
Update the status portion of the Board markup:
src/components/Board.svelte
<div class="status">
  {#if winningPlayer}
    <p>WINNER: <strong>{winningPlayer}</strong></p>
  {:else}
    <p>Current Player: {currentPlayer}</p>
  {/if}
</div>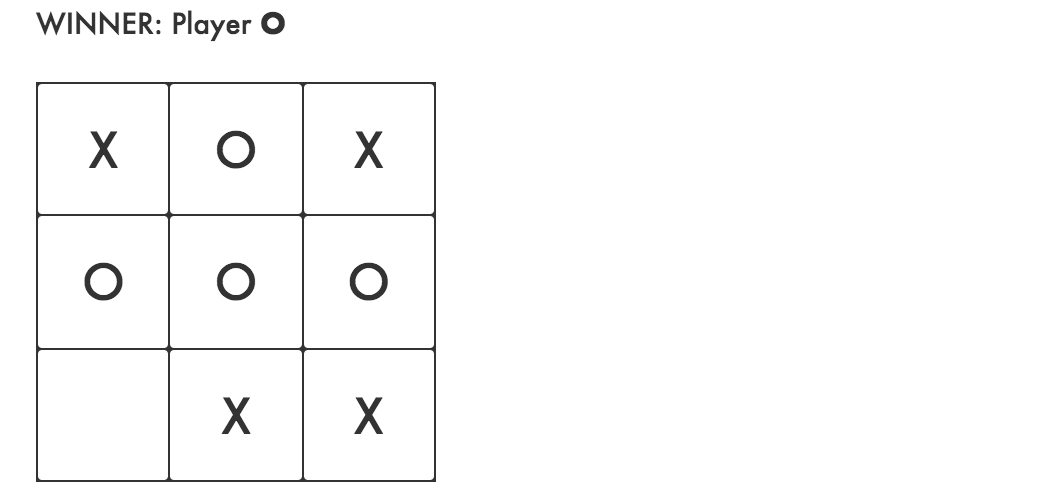
Huzzah! A working tic-tac-toe game.
Advanced Concepts
Now that our tic-tac-toe game works let's look at adding some other features. We'll be refactoring a lot of the work we already did to make a history of moves and time travel possible.
Convert DOM Event to Component Event
Components themselves can emit events by using createEventDispatcher to dispatch custom events. Event dispatchers are functions that take two arguments: the name of the event and an optional detail argument that can contain any type of data. Any data provided when the event was dispatched is available on the detail property of the Event object.
Component events created with createEventDispatcher do not bubble and are not cancellable with event.preventDefault(). Listening for component events looks the same as listening for DOM events:
<SomeComponent on:whatever={handler}/>Let's refactor our Square component from using a DOM event to dispatching a custom event with the Square's id as its detail. When the Game component listens for the event it will know which Square was clicked.
Import the createEventDispatcher function and store it in a variable named dispatch. Create a prop called id using the export let syntax. Create a handleClick function that will dispatch a custom squareClick event with an object containing the Square id as the detail. The button will fire that function and dispatch the event via its on:click DOM event.
Update the script and markup of the Square component:
src/components/Square.svelte
<script>
  import { createEventDispatcher } from "svelte"
  export let value
  export let id

  const dispatch = createEventDispatcher()

  const handleClick = () => {
    dispatch("squareClick", {id})
  }
</script>

<style>
...
</style>

<button on:click={handleClick}>{value || ' '}</button>
Next let's refactor the Board component.
First in the Board markup, rather than using on:click inside the Square component listen for the custom on:squareClick. Board will also pass Square an id prop based on the current index of the #each loop.
src/components/Board.svelte
{#each squares as square, i}
  <Square id={i} on:squareClick={handleClick} value={square} />
{/each}
Next, handleClick now receives an event object (e). Store the current Square value found on the event detail and use that instead of i.
src/components/Board.svelte
function handleClick(e) {
  const currentSquare = e.detail.id
  if (!winningPlayer && !squares[currentSquare]) {
    squares[currentSquare] = currentPlayer
    const allSquaresFilled = !squares.filter(square => !square).length
    currentPlayer = currentPlayer === "X" ? "O" : "X"
    winningPlayer = calculateWinner(squares) || (allSquaresFilled && "DRAW")
  }
}
Lift State To Game Component
It's time to lift up all the state into our Game component to make it the single source of truth.
Remove all state from Board. Board will receive it's squares from Game so we export that prop and initialize it to an empty array. The on:squareClick directive needs to be forwarded up to Game so that gets updated to an empty directive. We'll also remove the status markup and styles since that will be handled in Game.
src/components/Board.svelte
<script>
  import Square from "./Square.svelte"
  export let squares = []
</script>

<style>
  .board {
    display: grid;
    grid-template: repeat(3, 1fr) / repeat(3, 1fr);
    grid-gap: 1px;
    width: 200px;
    height: 200px;
    margin: 0 auto;
    background-color: #333;
    color: #fff;
    border: 1px solid #333;
  }
</style>

<div class="board">
  {#each squares as square, i}
    <Square id={i} on:squareClick value={square} />
  {/each}
</div>
Game is mostly a copy/paste from Board. The only other changes are that we need to pass the squares prop to the Board component and add the on:squareClick event.
src/components/Game.svelte
<script>
  import Board from "./Board.svelte"

  let squares = Array(9).fill(null)
  let currentPlayer = "X"
  let winningPlayer = null

  function handleClick(e) {
    const currentSquare = e.detail.id
    if (!winningPlayer && !squares[currentSquare]) {
      squares[currentSquare] = currentPlayer
      const allSquaresFilled = !squares.filter(square => !square).length
      currentPlayer = currentPlayer === "X" ? "O" : "X";
      winningPlayer = calculateWinner(squares) || (allSquaresFilled && "DRAW")
    }
  }

  function calculateWinner(squares) {
    const lines = [
      [0, 1, 2],
      [3, 4, 5],
      [6, 7, 8],
      [0, 3, 6],
      [1, 4, 7],
      [2, 5, 8],
      [0, 4, 8],
      [2, 4, 6]
    ];

    for (let line of lines) {
      const [a, b, c] = line;

      if (
        squares[a] &&
        squares[a] === squares[b] &&
        squares[a] === squares[c]
      ) {
        return squares[a];
      }
    }
    return null;
  }
  </script>

<style>
  .game {
    display: flex;
    flex-direction: row;
  }
	.status {
    margin-bottom: 20px;
  }
</style>

<div class="game">
  <div>
    <div class="status">
      {#if winningPlayer}
      <p>WINNER: <strong>{winningPlayer}</strong></p>
      {:else}
      <p>Current Player: {currentPlayer}</p>
      {/if}
    </div>
    <Board {squares} on:squareClick={handleClick} />
  </div>
</div>
The functionality shouldn't change and the tic-tac-toe game should function just as before.
Adding History with Time Travel
To make it possible to have a history of moves we will be storing past versions of the squares array in a new variable called history. This history will be an array of arrays that represent all board states from the first to the last move.
The squares that get passed to the Board will now be defined as a copy of the most recent entry in the history using a reactive declaration.
Any top-level statement (i.e. not inside a block or a function) can be made reactive by prefixing it with the $: label. Reactive statements run immediately before the component updates whenever the values that they depend on have changed. That way our squares state updates when the history changes.
Let's also add a variable to keep track of the current turn.
src/components/Game.svelte
<script>
  import Board from './Board.svelte'

  let history = [Array(9).fill(null)]
	let currentTurn = 0
  let currentPlayer = "X"
	let winningPlayer = null

  // The Board representation is the latest state in history
  $: squares = history[history.length - 1].slice()
  ...
</script>
Next let's update handleClick.
Now after updating the state of the squares we will create a new copy of the current state of the board and then update the history with this new state thereby keeping a running tally of our game.
'src/components/Game.svelte`
function handleClick(e) {
  const currentSquare = e.detail.id

  if (!winningPlayer && !squares[currentSquare]) {
    squares[currentSquare] = currentPlayer
    const allSquaresFilled = !squares.filter(square => !square).length

    history = [...history, squares.slice()]
    currentPlayer = currentPlayer === 'X' ? 'O' : 'X'
    winningPlayer = calculateWinner(squares) || (allSquaresFilled && 'DRAW')
    currentTurn++
  }
}
Now that we are keeping track of a history of our Game we can display a running tally next to the Board. We'll use a combination of #each and #if expressions to loop over our history and determine how to display it.
On our first turn, we simply show that the game has begun. Each successive turn will render a list element displaying the current turn as well as all previous turns as buttons with an on:click to jump to that turn.
In the Game markup, before the closing div add the following:
src/components/Game.svelte
<ol>
{#each history as move, i (move)}
  {#if i===0 && history.length > 1}
    <li>
    <button on:click={() => jumpToTurn(i)}>
    Jump to start
    </button>
    </li>
  {:else if i+1 < history.length}
    <li>
    <button on:click={() => jumpToTurn(i)}>
    Jump to turn {i+1}
    </button>
    </li>
  {:else}
    <li>
    Current Turn : {i===0 ? 'Game Start':i+1}
    </li>
  {/if}
{/each}
</ol>
Now let's define the function jumpToTurn. THis will reset our history to the element corresponding to the turn we are rewinding to, update our currentTurn and currentPlayer and then hard reset winningPlayer to null since this would be a point in time before a winner is declared.
In the script section of Game add the following function just under our handleClick:
src/components/Game.svelte
function jumpToTurn(turnID) {
  history = history.slice(0, turnID + 1)
  currentTurn = turnID
  currentPlayer = turnID % 2 === 0 ? 'X' : 'O'
  winningPlayer = null
}